Monday, January 16, 2012

Homemade Headboard

It's DIY time! Headboards can be an easy change for your room and if you don't have one.. make one! I've watched countless tutorials on how to make a headboard; from Get it Sold to Design On A Dime, the hosts of these shows both proved how EASY it is to make a headboard.

So I finally put my DIY headboard to a test when it came time to redo my daughters room. As you know I was on a serious budget and the DIY tutorials that I watched were just as affordable BUT did I mention I was on a BUDGET...LOL..Yes I had to be resourceful and creative..so while I was having the fabric for my headboard cut, I noticed the cardboard used to roll the fabric was piled high behind the counter. Now the DIY tutorials showed the use of plywood as the base which can run anywhere from $20 and up and of course, the larger size of the headboard, the more $$. I figured if I find a thick piece of cardboard it would hold just as well as the plywood. So I asked the fabric cutter if I could take a few..She said I could take as many as I wanted! FREE = HAPPY ME! So I walked out of there with my 2 1/2 yards of fabric, the 70% off Christmas batting originally priced at $6.99 and my free cardboard. In total I only spent $16! 

So here its..Easy peasy! 

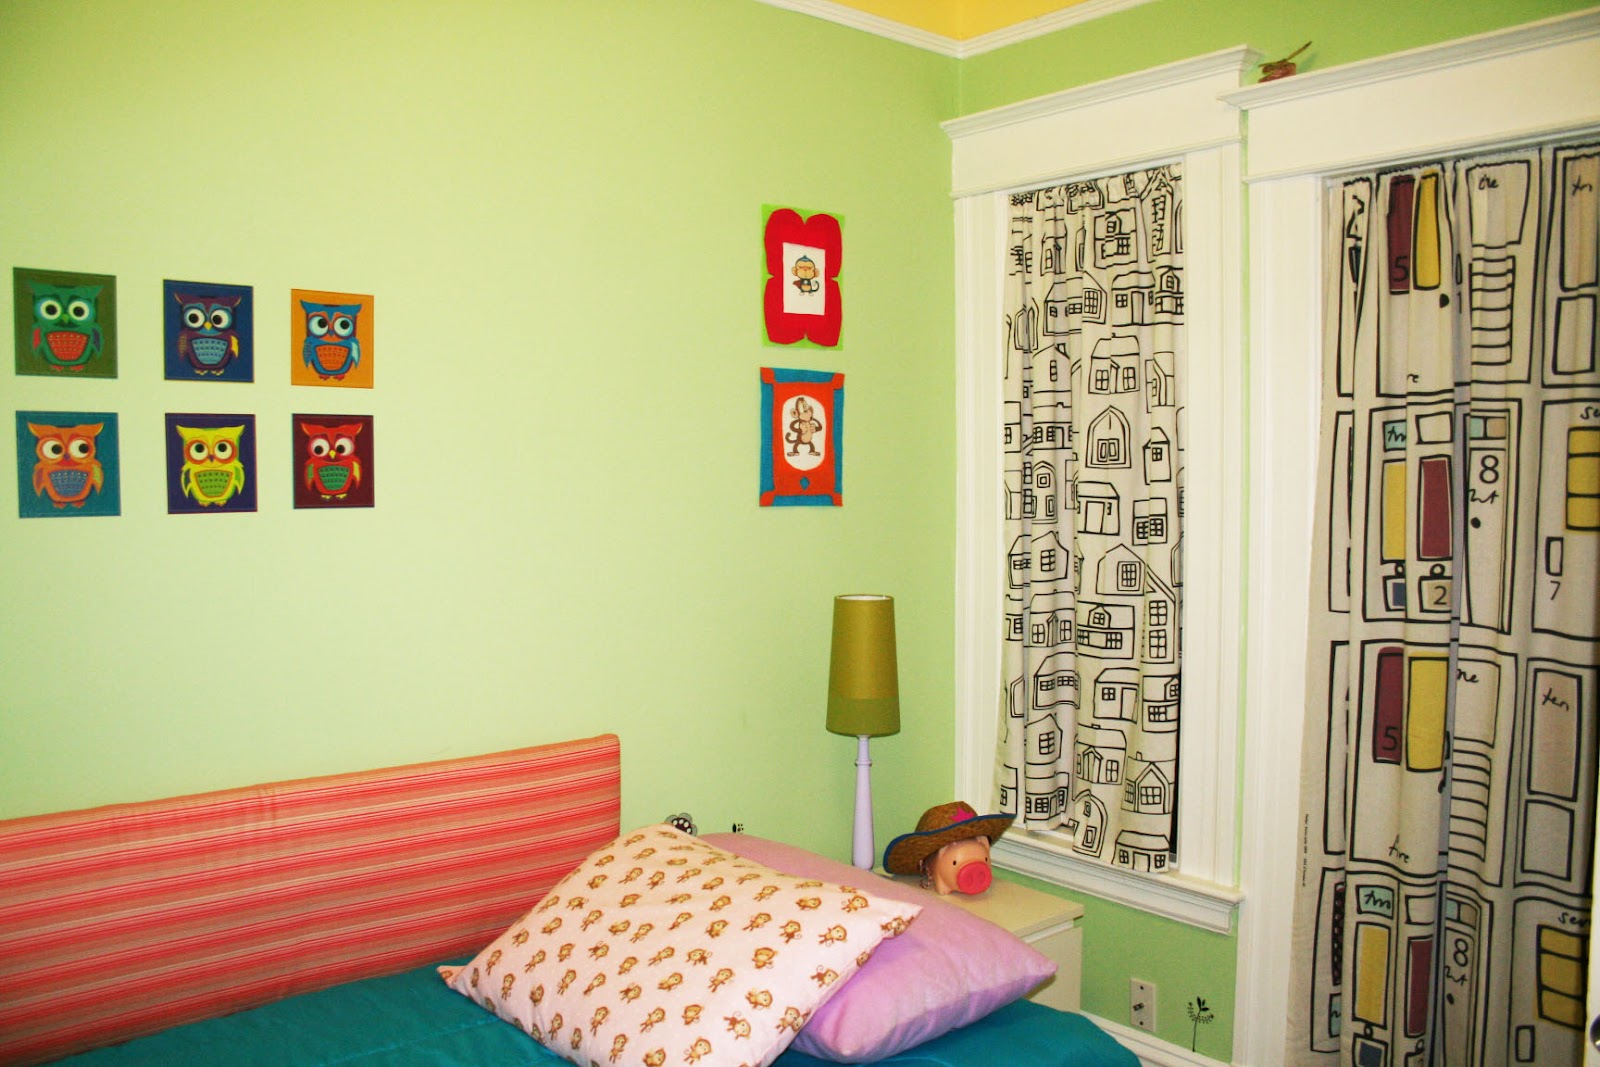
Measure out the size of your headboard. My rule is to measure your bed and have the headboard the same length but that is entirely up to you. Over sized headboards make a great statement in the room. I made my daughter a side board and made it shorter than the length of her bed to add the decals on each side of it; this was part of the design.
Lay out your fabric face down on a flat surface. Place batting over fabric. (fabric and batting should be larger than the size of plywood or cardboard on all sides; at least 6").
Place plywood or cardboard on top of fabric and batting. Here I have excess batting, so I carefully pulled it off leaving about 3" on all sides.
Time to take out that glue gun. If using plywood, use a staple gun.
For more stability, I glued cardboard pieces going the opposite direction.
Pull the fabric over tightly and glue along the edges of the board. Trim off excess fabric.
Since I used cardboard it was easier to hang. I used Velcro strips to stick to the wall. Use mirror hangars if you used plywood.

I was pleased with the outcome and am happy to report that it really is an easy project. Give it a try..

Here are more DIY headboard ideas...
hgtv.com
Remember I said that a over sized headboard makes a statement..well this is a great example..Looks like 2 sizes of plywood layered on top of each other with bronze studs bordering the smaller piece for definition. The bold fabric says it all. Love it!
Dividers also make a great headboard and its that much more easy to make. If you have one lying around give it a simple makeover with a bold colored spray paint. 
renaekeller.com


Test out your DIY self skills. Make that simple change for the new year. Trust me, you'll love the new and refreshing focal point in your room! ~MG

Monday, January 9, 2012

MY DAUGHTER'S ROOM MAKEOVER

Happy New Year! Wow it has been a crazy holiday season. As much as I've done no fuss holiday decorating and avoided cooking main meals I still managed to have quite an exhausting holiday! I guess there really is no such thing as a "chill" holiday.  But i am so glad all the hustle and bustle was over because I was able to really get a move on re-doing my daughter's outdated and outgrown room. She turned 4 in early December and each year since she was 2 I've updated her room based on her age and newly developed personality. Unfortunately I failed to take BEFORE photo's of her room but it was nothing more than your typical little girly girl room filled with Disney princess characters of pink and purple shades of all shapes and sizes. Needless to say it was time for the bright princess infested room to GO. I knew that the next change had to be different but still matched her quirky, yet fun and silly personality. I had to transform her small 11x 14 ft room into something that would allow her to grow and have plenty of room to play in.

Now just to give you an idea of my silly little goose..here she is wearing some of her Aunt and Grandma's clothes...put together by herself of course.

My husband and I find that if we give a little warning for something she is about to experience, she won't fuss or make a big deal over it. For weeks I warned her that she had to say bye bye to her princess theme and she was okay with it. Lately she's been into monkey's so going into the design I asked if she wanted a monkey themed room. She was thrilled and even said she wanted monkey decals. I took that into consideration but it was surprisingly difficult to find the monkey decals we were looking for which were a set of monkeys making silly faces. I had a $400 budget which a majority went towards the bed. I found monkey decals on ETSY but they were way out of my budget. So I got creative and found my silly monkeys and turned them into portraits. I initially wanted some ornate frames spray painted in neon colors but it was way out of my price range so I decided to make them with felt. 

I made the side board myself using the same technique you would as a headboard. All I paid for was the fabric and the batting which is the Christmas snow batting used to display those Christmas villages. It came in a roll and it was 70% off. The fabric was also 30% off! While getting my fabric cut, I noticed a pile of leftover cardboard in which the fabric is rolled in. I asked if I could have a few and the lady said I can take as many as I wanted. This was the base of the board. 
I didn't want a full on monkey room theme because I love monkeys too much to end up hating them. I wanted to mix it up and make a statement that children's bedroom don't have to consist of one mainstream brand. I wanted a whimsical room full of character and the unexpected.

In last years Ikea magazine I came across the newly designed fabric by Emma Jones. I loved the hand drawn pattern of houses and doors and knew I wanted to use this style some day. And voila! Here it is in my daughter's room used as a curtain and closet cover. They were $4.99/yd. BUT as I was searching through the pile of remnant I came across a pattern that was similar in color as the door (shown above) pattern only it was houses. It was probably 2 yards, maybe less, but I picked it up along with the other two chosen patterns. Lucky for me they could not locate the price for the door design so they priced it the same as the remnant at $1.99/yd. BARGAIN! I love when that happens!
I know I know..she needs a new T.V.! LOL..BUT hey we used what we had and stuck to our budget.
I had some left over fabric so I cut out the houses, glued them onto some black poster paper for stability and used it as wall art. I found my old wall decals of branches with birds that I never used to add that unusual effect.
Her own little space to draw..and eat..this is where her T.V. used to be placed on top of a vintage sewing table. That was horrible and I can't believe we had it in her room for 2 years! To make it even more claustrophobic she used to have a closet door that was placed ergonomically incorrect. When her room door and closet door were both open the T.V. was closed in. So naturally that door had to go and we moved the massive T.V. arrangement  to effectively use that space. Oh and by the way...the only Disney traces are of this Tinkerbell nightlight and a Princess and the Frog pillow that I turn over and will soon be covered with the remnant I found at Ikea...she would not let it go..

With an extremely small budget and putting practicality to good use, I was able to transform my daughter's room into her own little oasis. Now she stays in her room comfortably and with the addition of her little table set, I've provided her with her a own little art space where she loves to sit and paint or color allowing her to develop a new set of skills.

This project is one of many that proves you can re-decorate on a small budget. As long as you go in the project with an open mind, your goals will be met.~MG